Enhance availability for redundant services
Better distributing redundant services for higher availability
Goal
- This tutorial shows howto distribute instances to different hosts using servergroups
- It is also shown how to force instances on the same host
Prerequisites
- You know the basics of using the OpenStack CLI-Tools.
- Environment variables are set, like shown in the API-Access-Tutorial.
Problem
By default, there is no guarantees wether servers will be distributed across different hypervisors. The Nova compute scheduler makes that decision based on available resources.
This can lead to services that are meant to be highly available to share a common host and thus share a single point of failure.
Inversely it might be desired to have two services to be located as close as possible, because they will need high bandwidth between each other.
Both cases are solvable using ServerGroups. That way you can influence the distribution of instances.
Create the servergroup using the horizon dashboard
Servergroups can be created using the dashbaord or the openstack cli. We'll show the creation using the dashboard first.
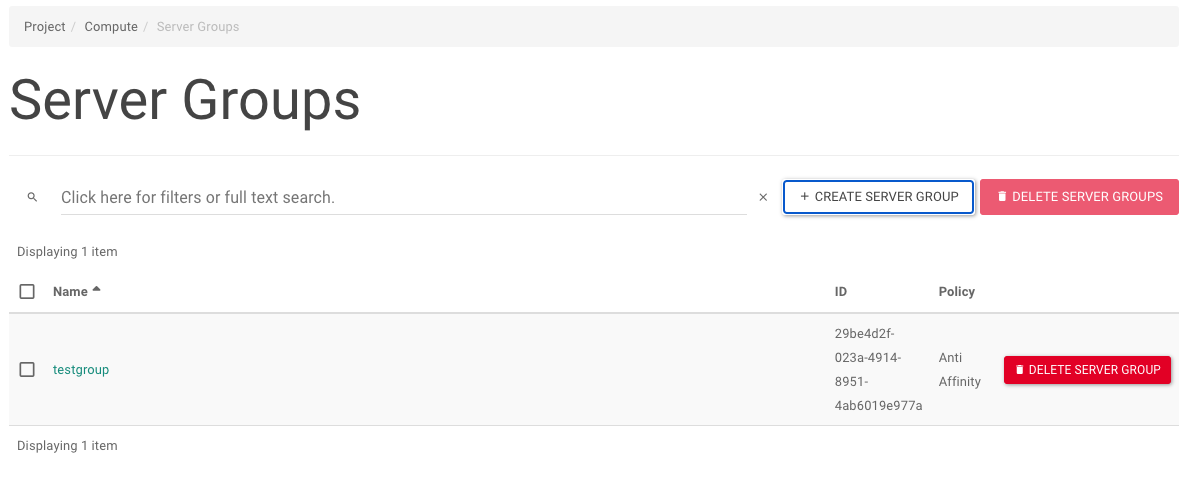
- Click on "Project" -> "Compute" -> "Server Groups"
- Click on "Create Server Group"
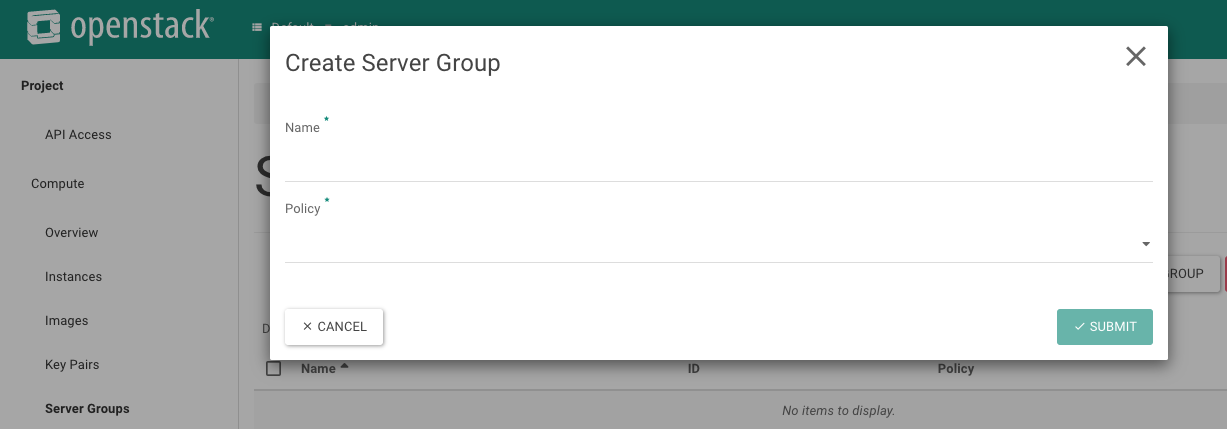
- Set a name for servergroup
- Choose one of the policies.
- Click "Submit"
You can choose between 4 different policies.
Anti-Affinity: Nova guarantees that instances inside this group are not running on the ame hypervisor. If no other hypervisor is available instance creation will fail.
Soft Anti Affinity: Working the same as normal anti affinity but just a "preference". Instance creation does not fail if no other hypervisor is available.
Affinity: Nova guarantees that instances inside this group will run on the same hypervisor. If resource of the hypervisor are exhausted, instance creation will fail.
Soft Affinity: Working the same as affinity but is just a "preference". Instance creation does not fail if instance can not be created on the same hypervisor
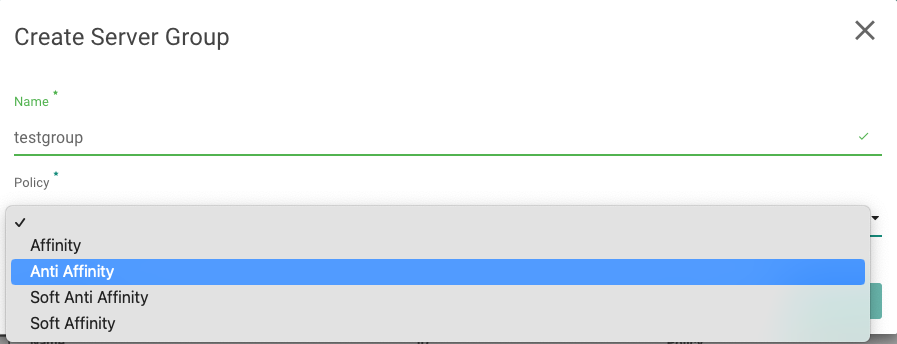
In our example we'll use the Anti Affinity Policy.
Create the servergroup using the Command-Line-Interface
The first step is to source your openstack credentials. Please see our OpenStack CLI-Tools how-to when you dont have them already.
❯ source openstack-openrc.sh
Please enter your OpenStack Password for project demo as user demuser:
Then you can create the servergroup by issuing the following command
❯ openstack server group create --policy anti-affinity testgroup-cli
+----------+--------------------------------------+
| Field    | Value                                |
+----------+--------------------------------------+
| id       | bae29391-6ff7-43a7-b5c9-a8dd2feccb3f |
| members  |                                      |
| name     | testgroup-cli                        |
| policies | anti-affinity                        |
+----------+--------------------------------------+
Example
During the instance creation we can now use our newly created server group.
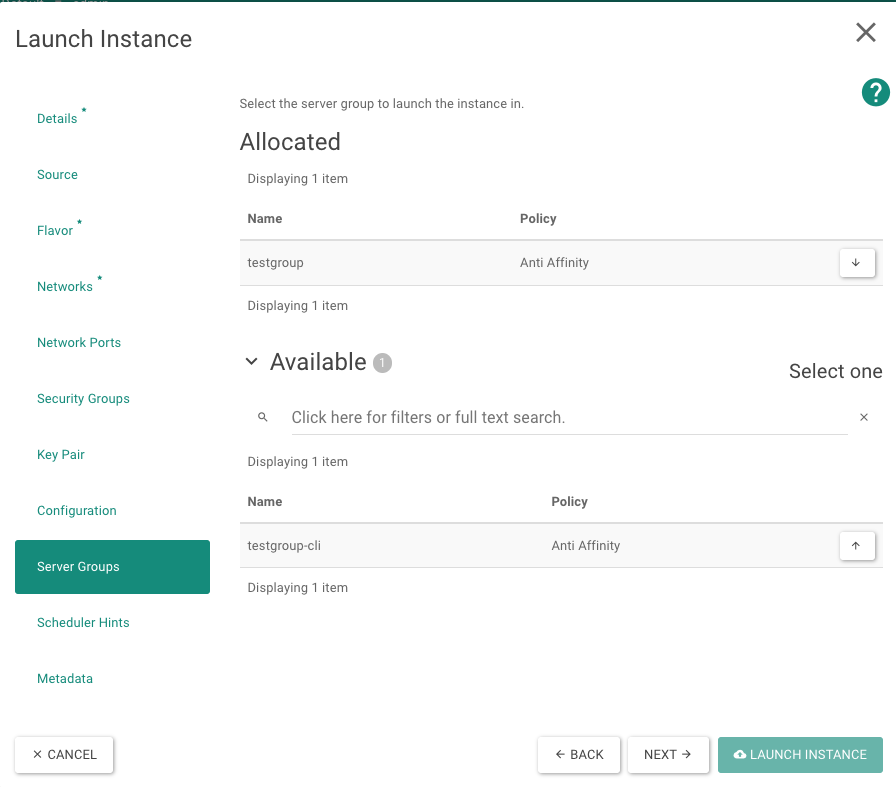
If you want to use the CLI you can provide the --hint group=<SERVERGROUP_UUID> parameter.
❯ openstack  server create --network Extern --flavor small \
  --hint group=29be4d2f-023a-4914-8951-4ab6019e977a --image focal --boot-from-volume 10 test-sgroup
+-------------------------------------+--------------------------------------+
| Field                               | Value                                |
+-------------------------------------+--------------------------------------+
| OS-DCF:diskConfig                   | MANUAL                               |
| OS-EXT-AZ:availability_zone         |                                      |
| OS-EXT-SRV-ATTR:host                | None                                 |
| OS-EXT-SRV-ATTR:hypervisor_hostname | None                                 |
| OS-EXT-SRV-ATTR:instance_name       |                                      |
| OS-EXT-STS:power_state              | NOSTATE                              |
| OS-EXT-STS:task_state               | scheduling                           |
| OS-EXT-STS:vm_state                 | building                             |
| OS-SRV-USG:launched_at              | None                                 |
| OS-SRV-USG:terminated_at            | None                                 |
| accessIPv4                          |                                      |
| accessIPv6                          |                                      |
| addresses                           |                                      |
| adminPass                           | 12345678                             |
| config_drive                        |                                      |
| created                             | 2022-10-21T15:19:45Z                 |
| flavor                              | small (101)                          |
| hostId                              |                                      |
| id                                  | 70c0a6a3-7668-4ddb-b343-bca6ec768606 |
| image                               | N/A (booted from volume)             |
| key_name                            | None                                 |
| name                                | test-sgroup                          |
| progress                            | 0                                    |
| project_id                          | 278a263355b94573a3b41bf9bb7e8058     |
| properties                          |                                      |
| security_groups                     | name='default'                       |
| status                              | BUILD                                |
| updated                             | 2022-10-21T15:19:46Z                 |
| user_id                             | c88736ebddca43b289271990669a220a     |
| volumes_attached                    |                                      |
+-------------------------------------+--------------------------------------+
Conclusion
- increased availability when using anti-affinity policy
- increased data throughput when using affinity policy
There are two options to check whether the scheduler hints were fully considered. For one you can list the members of a ServerGroup:
❯ dev server group show 29be4d2f-023a-4914-8951-4ab6019e977a
+----------+--------------------------------------+
| Field    | Value                                |
+----------+--------------------------------------+
| id       | 29be4d2f-023a-4914-8951-4ab6019e977a |
| members  | 70c0a6a3-7668-4ddb-b343-bca6ec768606 |
| name     | testgroup                            |
| policies | anti-affinity                        |
+----------+--------------------------------------+
Also you can compare the hostIds of the individual instances:
openstack server show server_0 -c name -c hostId
+--------+----------------------------------------------------------+
| Field  | Value                                                    |
+--------+----------------------------------------------------------+
| hostId | eda910fefd0756ea0d88b7c84ba01ddc0f350332e351348a33e0132f |
| name   | server_0                                                 |
+--------+----------------------------------------------------------+
openstack server show server_1 -c name -c hostId
+--------+----------------------------------------------------------+
| Field  | Value                                                    |
+--------+----------------------------------------------------------+
| hostId | eda910fefd0756ea0d88b7c84ba01ddc0f350332e351348a33e0132f |
| name   | server_1                                                 |
+--------+----------------------------------------------------------+